A Call Queue places callers in a queue while agents handle other calls. The calls are then answered in the order received as agents become available. Call Queues is an optional add-on feature that can be purchased separately.
Note: If a Cost Center is bound to a Branch, selecting the Branch results in a read-only Cost Center field. However, if there is no Cost Center bound to the selected branch, the Cost Center must be selected manually.
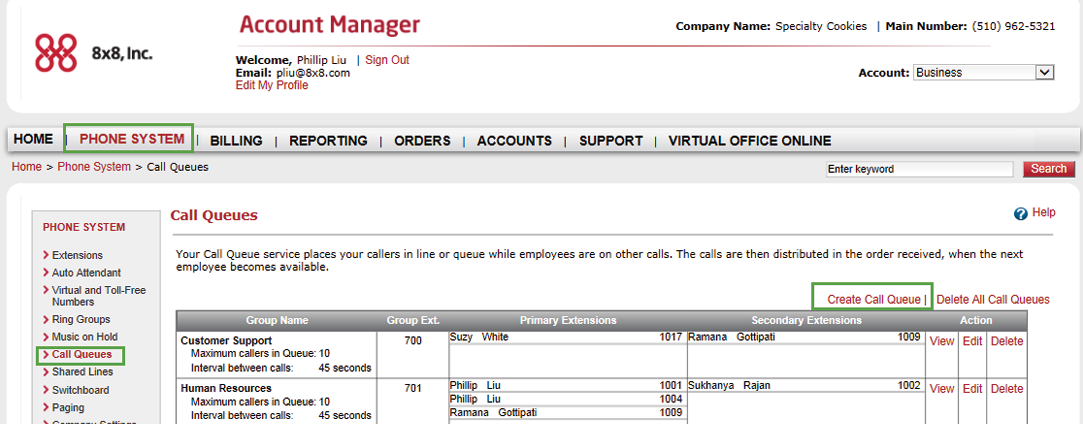
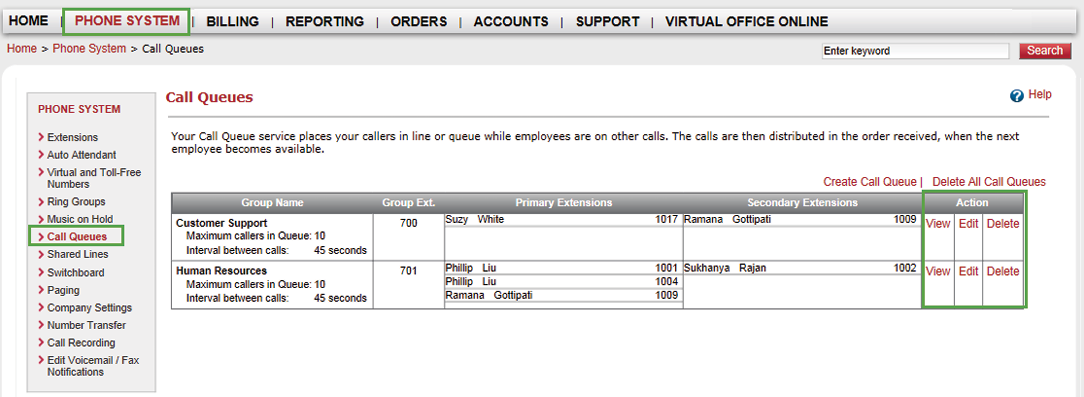
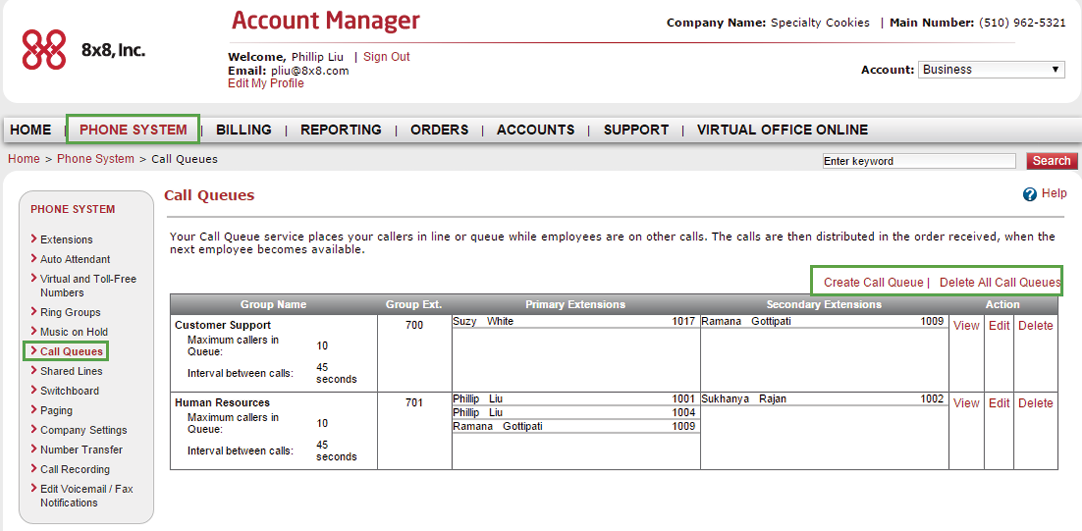
- Click Phone System in the top navigation bar.
- Under the Phone System menu, click Call Queues.
- Click Create Call Queue.
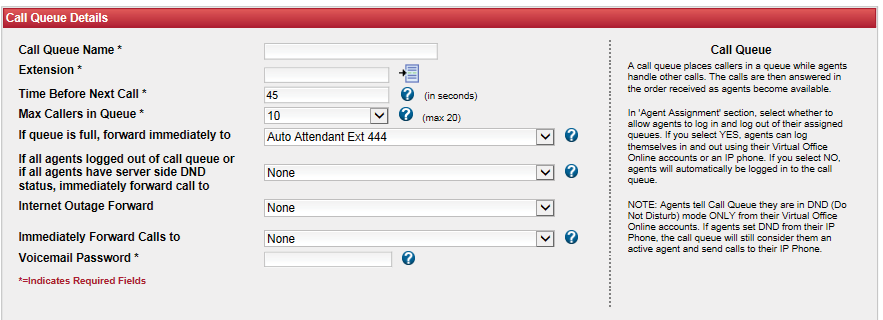
- Enter the Call Queue Details, including selecting an extension number. The * indicates required information.
Note: If you would like the system to suggest the next available extension number, click
 next to Extension.
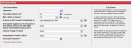
-
For voicemail password, enter a password that meets the security guidelines. Ring group members use this password to access the voicemails directed to the ring group.
 Voicemail Password Security Guidelines
To secure your voicemail password, the following password restrictions are enforced. The password:
- Should be 4-15 digits long.
- Should not use same digits such as 1111, 2222.
- Should not use years from 1900 till present.
- Should not be of ABAB format such as 1010, 2121,3131.
- Should not use sequential numbers such as 1234, 4567.
- Should not use easy to key in numbers from the center of keypad. The following numbers are not allowed - 2580, 0582, 5683 (spells LOVE).
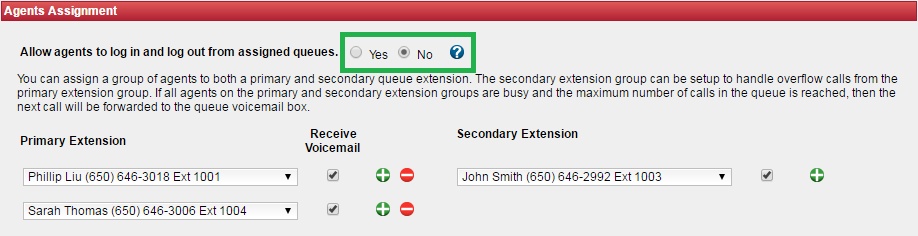
- Under Agents Assignment, assign agents to the call queue.
- Select whether to Allow agents to log in and log out of their assigned queues.
Note: If you select Yes, agents can log themselves in and out using the Virtual Office desktop app or an IP phone. If you select No, agents are automatically logged in to the call queue.
- Select a Primary Extension number from the list.
- Select a Secondary Extension number from the list.
Click or
or  to add or delete extensions.
Note: You can assign a group of agents to both a primary and secondary queue extension. The secondary extension group can be set up to handle overflow calls from the primary extension group. If all agents on the primary and secondary extension groups are busy and the maximum number of calls in the queue is reached, the next call is forwarded to the queue voicemail box.
- Select whether to Allow agents to log in and log out of their assigned queues.
- Select whether the primary extension receives voicemail.

- Click Save.
Note: In order to upload or record greetings, you must first create your profile and then edit it to enable those features.
- Click Phone System in the top navigation bar.
- Under the Phone System menu, click Call Queues.
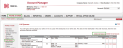
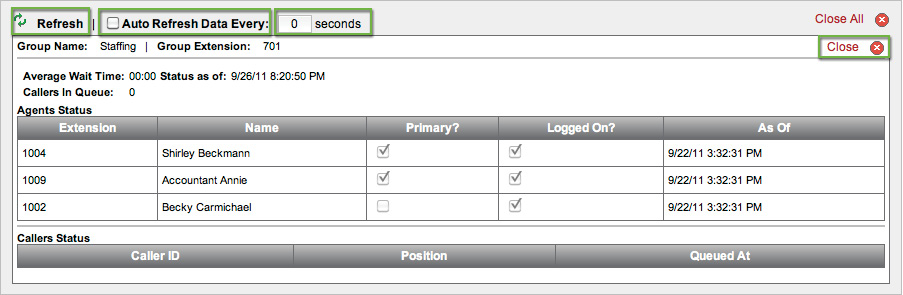
- Click View in the Action column for the call queue you want to see.
- Both agent and caller status is displayed.
- Click Refresh.
- If you want the display to refresh automatically:
- Select the Auto Refresh Data Every check box.
- Enter how often you want the display to refresh. The default is 20 seconds.
- Click Close to close the display.
- Click Phone System in the top navigation bar.
- Under the Phone System menu, click Call Queues.
- Click Edit in the Action column for the call queue you want to change.
- Edit Call Queue Details.
- Under Agents Assignment, you can:
- Select or clear the radio button controlling whether to allow agents to log in and out of their assigned queues.
Note: If you select the radio button, agents can log themselves in and out using the Virtual Office desktop app or an IP phone. If you clear the radio button, agents will automatically be logged in to the call queue.
- Click the Primary Extension drop-down arrow to select different extensions.
- Click and to add and delete primary extensions.
- Click the Secondary Extension drop-down arrow to select different extensions.
- Click and to add and delete secondary extensions.
- Select or clear the radio button controlling whether to allow agents to log in and out of their assigned queues.
- Select whether the primary extension receives voicemail.
- Upload or record an initial greeting that callers hear when they enter the call queue, if all agents are busy.
- Click Phone System in the top navigation bar.
- Under the Phone System menu, click Call Queues.
- To delete all call queues:
- Click Delete All Call Queues.

- When the dialog box appears to confirm your deletion, click Delete All.
- Click Delete All Call Queues.
- To delete an individual call queue, Click Delete in the Action column of the call queue you want to remove.


Initial Queue Greeting
The initial queue greeting is played when a caller first joins the queue. If all agents on the primary and secondary queue extension groups are busy and the maximum number of callers on the queue has not been reached, the next caller hears the initial queue greeting.
- Click Phone System in the top navigation bar.
- Under the Phone System menu, click Call Queues.
- Click Edit in the Action column for the call queue you want to change.
- Click Manage Greetings.
- Click Upload Custom Greeting.

- Click Add.
- Select the audio file you want to upload.
- Click Upload.
- Select the Set as Default check box.
- Review the Electronic Signature text, and click I Agree.
- Click OK when the dialog box appears confirming that you have successfully uploaded the greeting.


- Click Phone System in the top navigation bar.
- Under the Phone System menu, click Call Queues.
- Click Edit in the Action column for the call queue you want to change.
- Click Manage Greetings.
- Click Record Custom Greeting.

- Enter your phone number if you want your recorded greeting to be the default initial greeting for the queue.
- Click Start Recording.
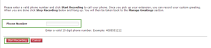
- The system calls you at the number you entered. When the phone rings, answer it and follow the voice prompts to record your message.
- Click Done Recording when you are finished.
- Your custom greeting now appears in the Initial Queue Greetings list with a
 , indicating that it is the default greeting for the call queue.
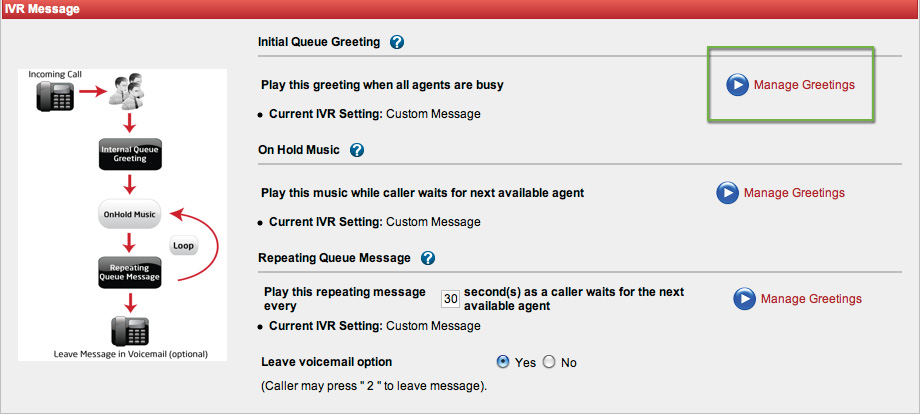


On Hold Music or Message for Use in a Queue
If all agents are busy, the caller continues to hear On Hold Music, which can be a music or a message. This plays immediately after the Initial Queue Greeting.
- Click Manage Greetings.

- Click Upload Custom Greeting.
- Click Add.
- Select the audio file you want to upload.
Note: An audio file can be a greeting or a piece of music.
- Click Upload.
- Select the Set as Default check box if you want this to be the default custom greeting.
- Review the Electronic Signature text, and click I Agree.
- When the dialog box appears confirming that you have successfully uploaded the greeting, click OK.

- Click Manage Greetings.
- Click Record Custom Greeting.
- Enter your phone number if you want your recorded greeting to be the default greeting for the queue.
- Click Start Recording.
- The system will call you at the number you entered. When the phone rings, answer it and follow the voice prompts to record your message.
- Click Done Recording when you are finished.
- Your custom greeting now appears in the list of queue greetings with a , indicating that it is the default greeting for the call queue.
Repeating Queue Message
A message plays at intervals within the hold music. The default interval is 60 seconds. You can also give callers the option to leave a voicemail by pressing the 2 key.
- Click Manage Greetings.
- Click Upload Custom Greeting.
- Click Add.
- Select the audio file you want to upload.
- Click Upload.
- Select the Set as Default check box if you want this audio file to be the default recording for the queue.
- Review the Electronic Signature text, and click I Agree.
- When the dialog box appears confirming that you have successfully uploaded the greeting, click OK.

- Click Manage Greetings in the Repeating Queue Message section.
- Click Record Custom Greeting.
- Enter your phone number if you want your recorded greeting to be the default greeting for the queue.
- Click Start Recording.
- The system calls you at the number you entered. When the phone rings, answer it and follow the voice prompts to record your message.
- Click Done Recording when you are finished.
- Your custom greeting now appears in the Initial Queue Greetings list with a , indicating that it is the default greeting for the call queue.